Posts Tagged ‘pictures’
So, what next? Zone 2 Training – March 30, 2016
Posted by admin in Training (running, cycling, etc.) on March 30th, 2016
I seem to have a motivation problem. I have been unmotivated to update here with the various foot items I have dealt with this past year. As seen in the May post from 2015, I had to stop running last summer. In the mean time, I strengthened my feet, stretched my calf, rode my bicycle to Canada, again, and kept on keeping on.
Now, I find myself on the cusp of another beautiful spring/summer training/racing season with two small hitches:
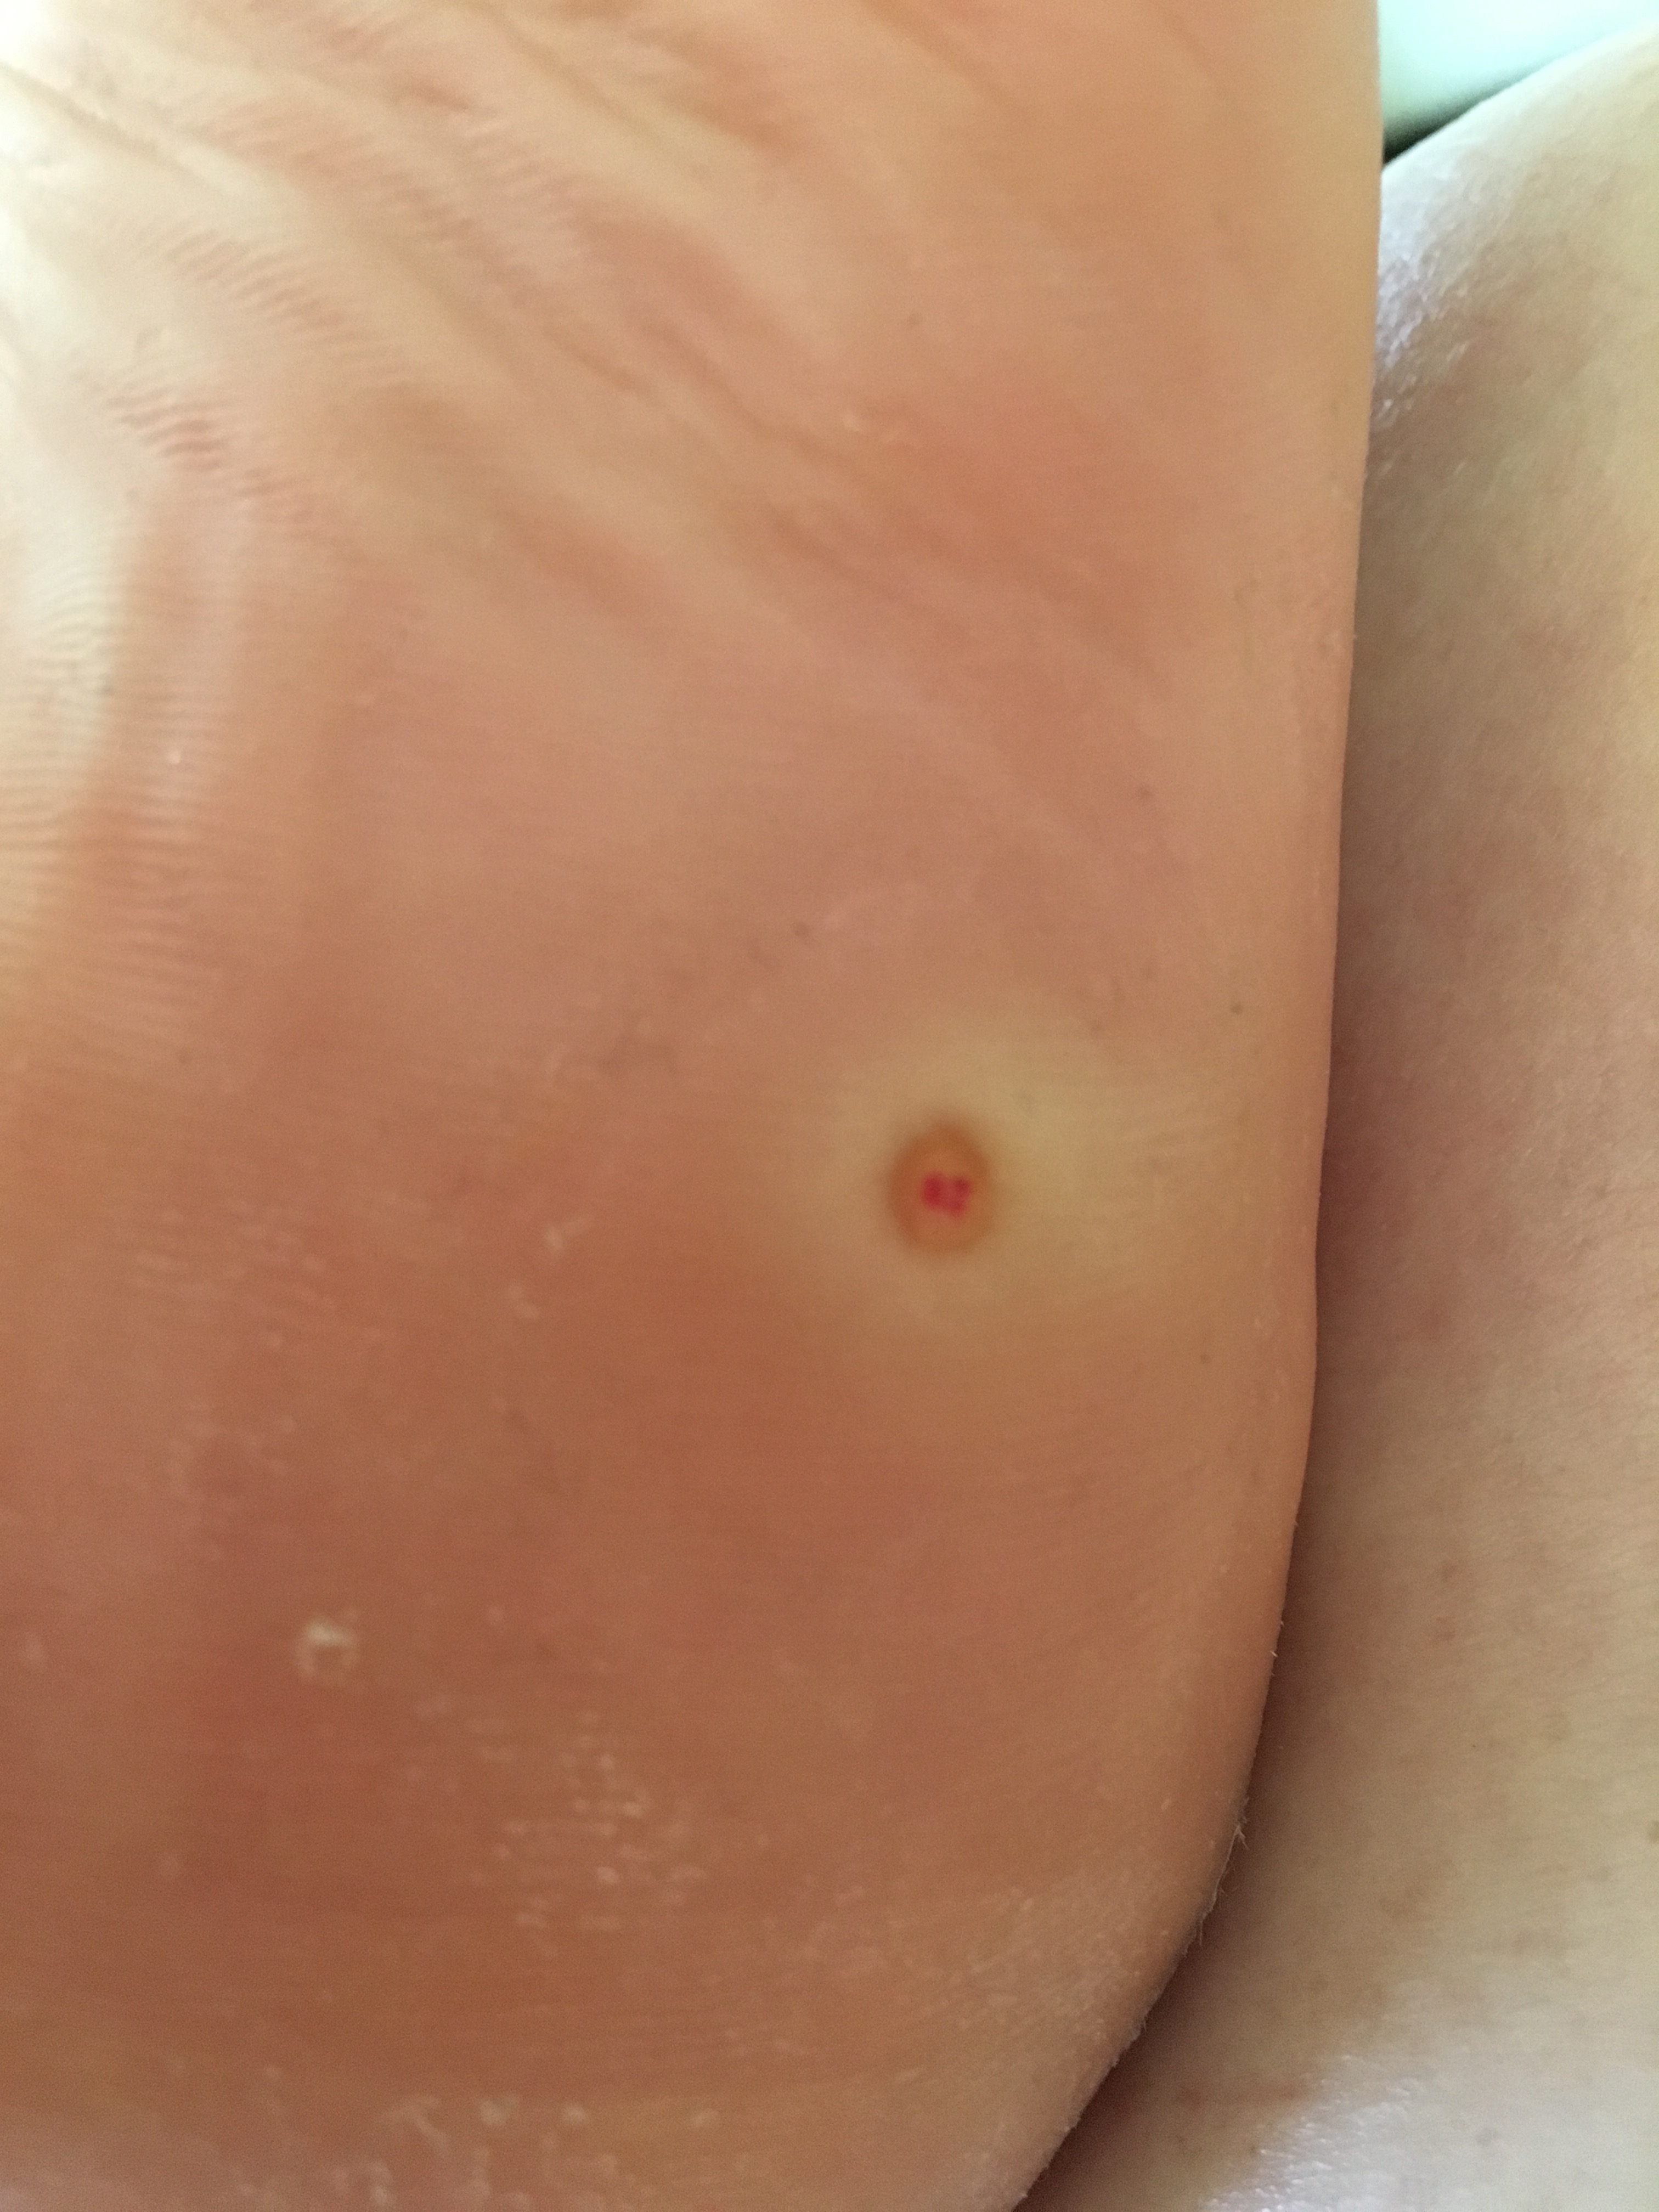
- A corn on the bottom of my left foot (What???)
 A corn, for those lucky enough to have never had one is a corn shaped (hence the name) hard callus-like formation under the skin. They usually appear on the toes, but if you are lucky enough to wear ill fitting shoes that cause friction or pressure in one spot on the bottom of your foot, you, too, may develop one of these lovely little guys. I have been trying to get rid of it by repeated use of a pumice stone on that area. So far, it has just continued to look like it does, but I have hope that one day I will get the entire corn out, which will relieve the irritation around it so that the sole of my foot can actually heal. I have since stopped wearing the shoes that I believe caused it. Here’s hoping!

2. Today I broke a toe on my right foot….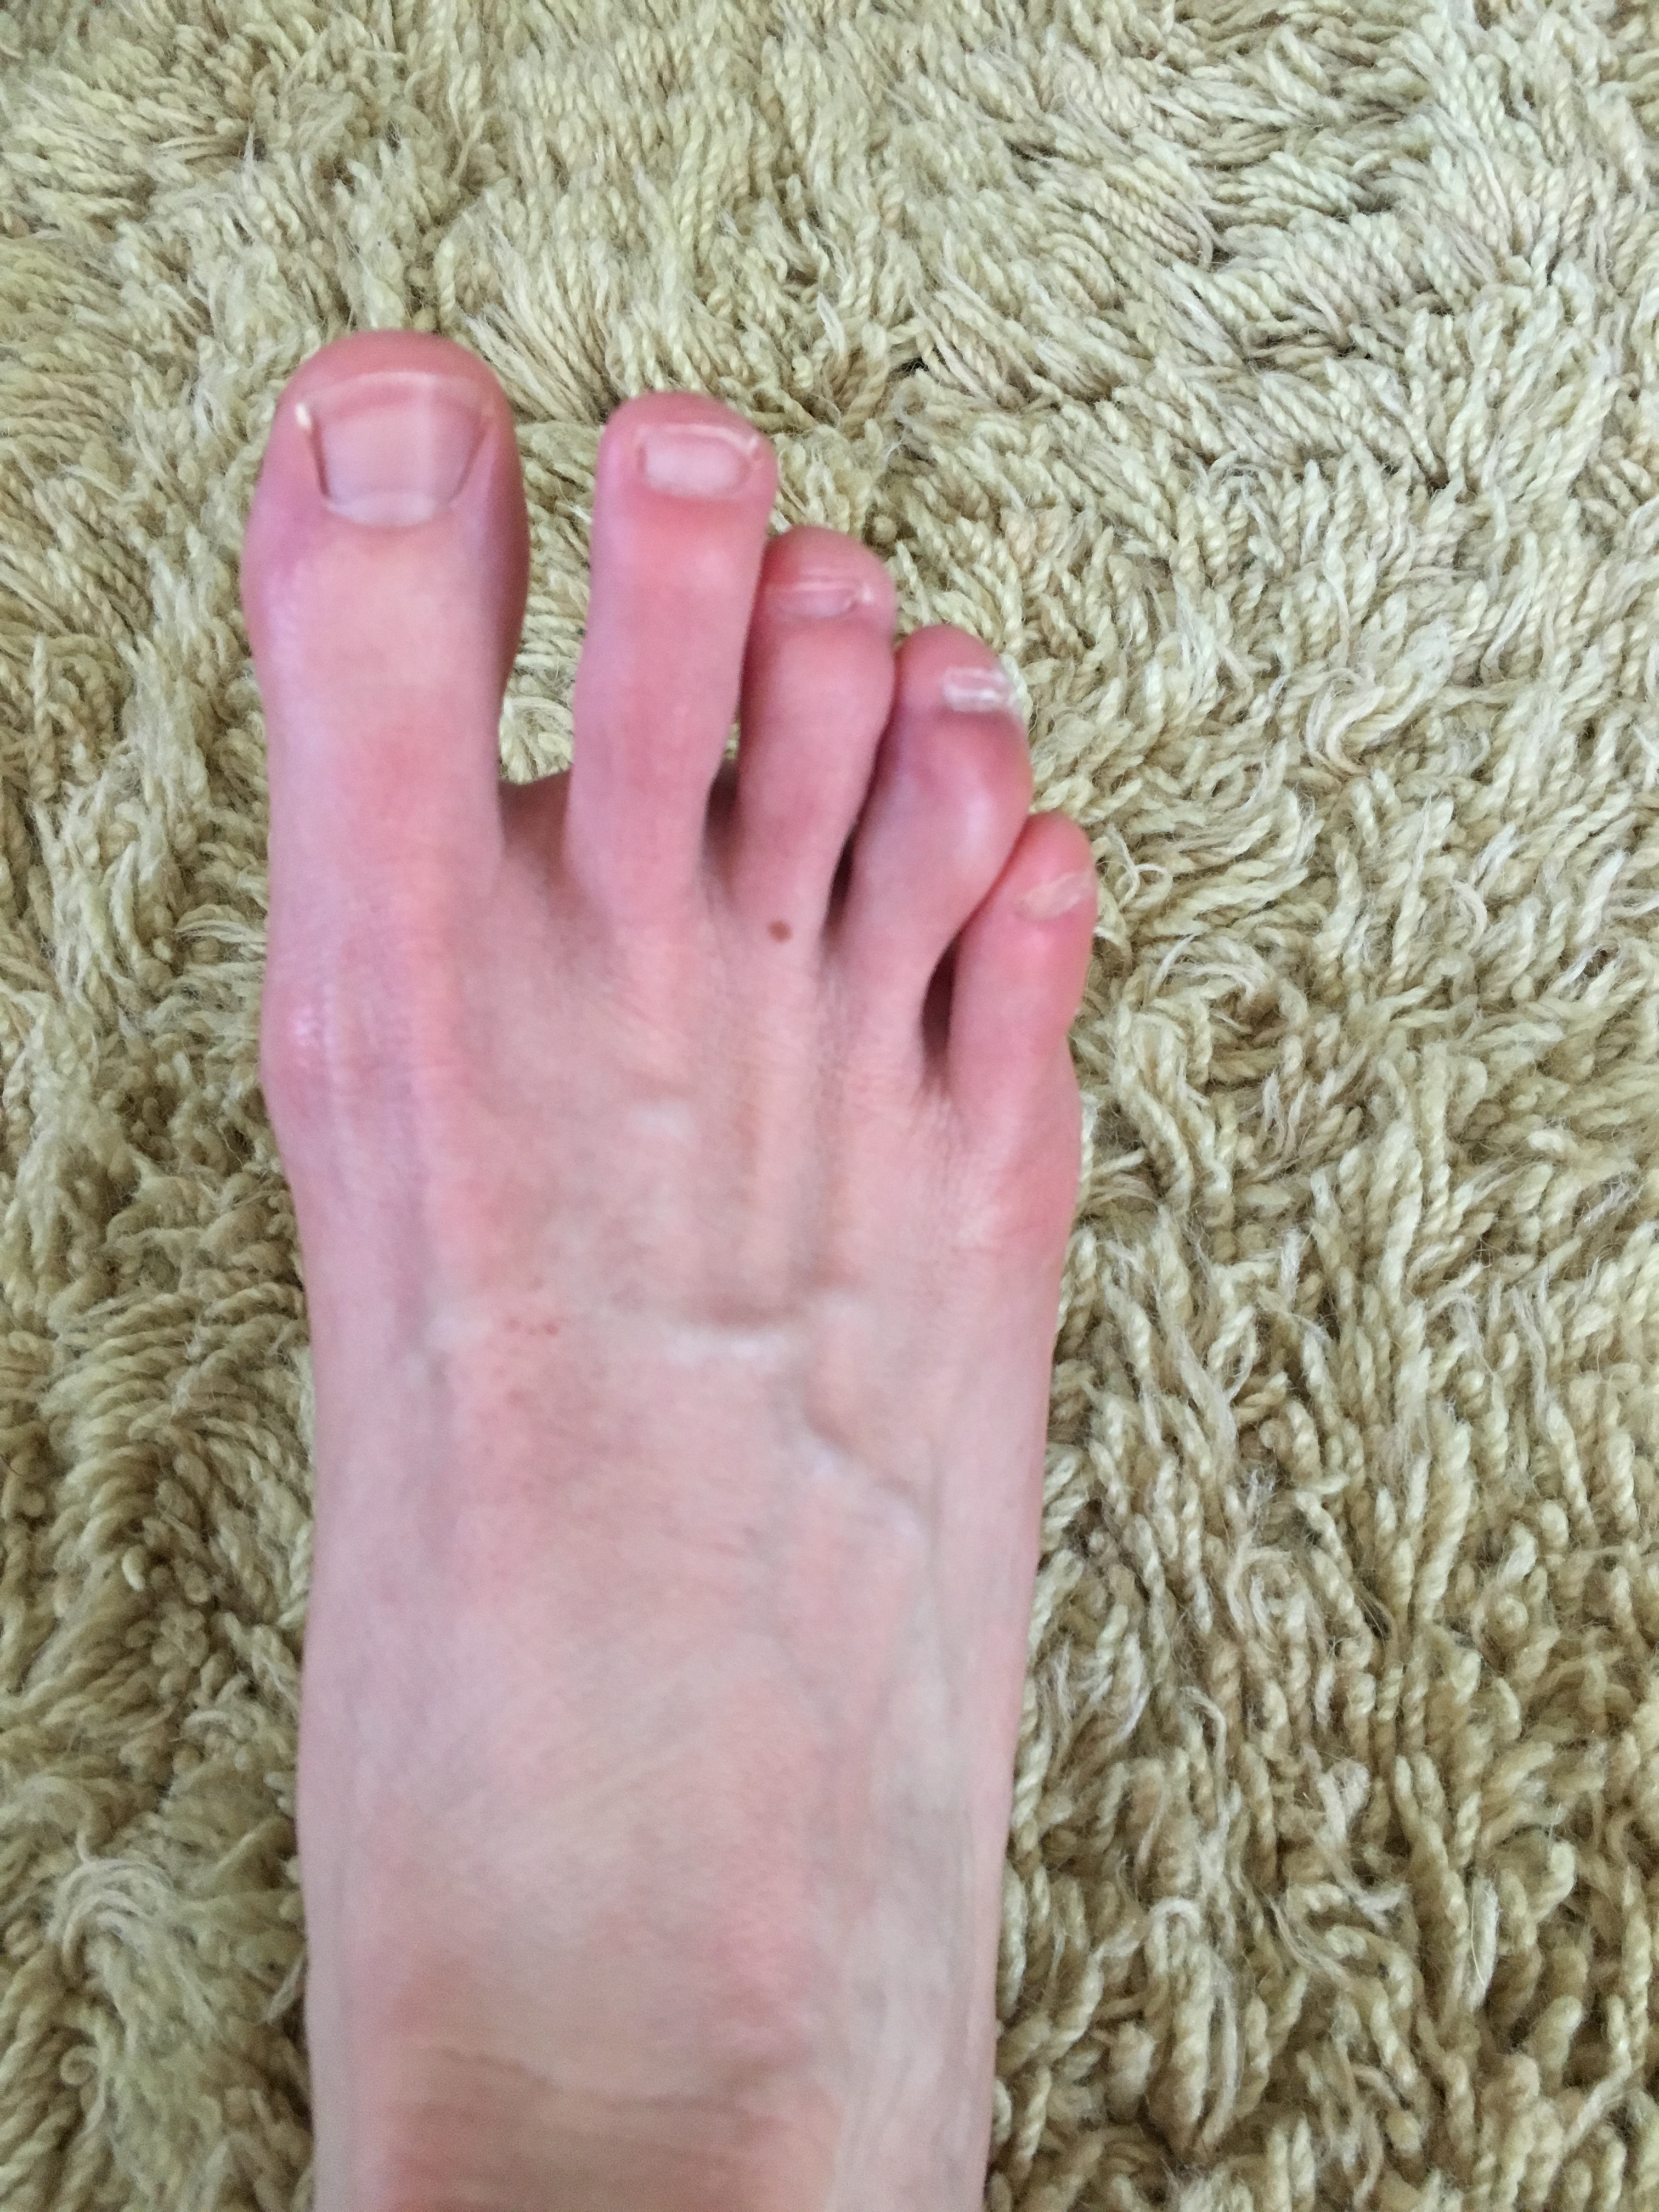
 All the small inconveniences aside, I am continuing to train and walk everywhere.
I have also changed my running/training philosophy from the focus-on-speed-and-always-go-as-hard-as-I-can to the train-in-Zone-2-heart-rate (using the Maffetone Method) and check-in-to-see-how-my-body-is-doing.
What is a Zone 2 heart rate? One way to find it is to take your age and subtract it from 180. That is the low end of your Zone 2. If you have an injury, or are prone to injury, take another 5 off that number for your low end. Then add 10 beats per minute for your Zone 2.
Ex: I am 39. Step 1: 180-39 = 141; Step 2 (injury prone) 141-5 = 136; Step 3 (add 10): 136 + 10 = 146 –> My Zone 2 roughly estimated is 136 to 146 heart beats per minute.
How do I execute this type of run? I wear my heart rate monitor during the workout. To start, I walk for 15 minutes to warm up my body (I try to find a good hill to hike up so that my heart rate does get an increase during the warmup). Next, I run until my heart rate hits 146 (my heart rate monitor vibrates at me to slow down as I set it up to keep me in Zone 2). Then, I walk until my heart rate hits 136 (and watch vibrates), and I repeat for the amount of time or mileage I am working toward.
I’ve been doing the Zone 2 heart rate runs since January not super regularly because of ski season. I try to only do one load bearing activity per week (i.e. a run/walk Zone 2 training or skiing each week). Since instituting this simple rule/philosophy, I have not suffered from Posterior Tibial Tendon (PTT) inflammation except for the one time that I did a run/walk two days in a row (duh!).
How has my fitness been impacted? I can now workout at least 4 times per week (one run/walk for at least an hour – working toward 1.5 hours or 6 miles – or skiing for one day; two strength training workouts; and one or two bicycle training rides) without injury! This is huge. My goal is to be injury free (whoops – broke my toe!) for this training season, and so far so good on the tendon side.
What am I hoping to accomplish? Over time, this method is supposed to help your body be more efficient and enable you to eventually run faster in a lower heart rate zone. When I run for an extended period of time, my heart rate is typically 163 to 170 beats per minute. So, my goal is to have my heart rate be in the 150’s when I run continuously (at least on flat terrain). Only time will tell for this goal.
9/30/12 – TRIFREAKS Triathlon Sprint: A For Reals Triathlon
Posted by admin in Training (running, cycling, etc.), Triathlon Training and Races on September 30th, 2012
Today, my brother-in-law, Drew, and I completed the Trifreaks Triathlon Sprint. It was his first ever tri and my second. So, being the seasoned vet that I am, I was giving advice and helping him gather his gear and set up his transition area. I even took him to Greenlake for a pre-race swim on Friday when he arrived in Seattle because he had never had a chance to swim in his wetsuit. Yes, I am rad. Totally.
We excitedly picked up our race packets yesterday in Kirkland, the race location. Having spent relatively no time in Kirkland, I was not familiar with the race course. So, we drove it.
OMG. The bike course.
HILLS.
No, that wasn’t the last hill, there’s more. Oh, good a flat – no WAIT! The hill keeps going around that turn.
For 2.37 miles we climbed a total of 430 feet. Then we went down and up, down and up, down and up, then a final descent of 430 feet over 2.40 miles. That final descent looked kinda scary, but much better than another climb! The real kicker was that we had to do it all AGAIN – yep, two laps to make 13 miles. Yay!
I guess it is good to know what you’re going to be facing, but man, does it have to be so blunt?
Anyway, that was yesterday. Today, we got up to 48 degrees F. Whoa. That is cold. A wetsuit cannot save you.
The rundown:
4:00am – alarm goes off.
5:45am – arrive in the dark and 45 degrees to rack our bikes and set up our areas (note to self: take a head lamp next time to see in the dark).
6:30am – first of TEAM ERIN arrived with Lynda and Matt, who randomly ran into Adam in Starbucks!
7:00am – the sun started to rise, and we have wetsuits on. No shoes – thus begins the numb toes.
Drew and I had decided to go in the 5th or 6th wave (somewhere in the middle) since we figured we were middle finishers. So, we didn’t start until 7:30am. First of all, you know it is cold outside when the 65 degree F water feels warm. By the time I hit the water, I definitely had numb toes and several numb fingers on each hand. I was mildly annoyed and scared by this, but I figured that once I started to swim, I might warm up enough to get those digits back to having some feeling.
Around 7:25am, our self-selected wave started. We were off! The first leg of the triangle went great! I decided to polo free style out of the start line, then I did the breast stroke for the remainder of the race. One goal is to freestyle the entire race. Once around the first corner buoy, all hell broke loose.
I could NOT see! We were heading due East, and the sun was just over the horizon right where the next buoy should be. Wow! Then, there was the steam coming off the lake to add to the fun. I used the boats and other people as sights, but I lost time here due to being disoriented and blinded by the sun. Meh.
Last third was cake without the sun in my eyes and I made it in in 24:41. Not bad! Right on target. I would have been faster if not for that sun thing in the middle.
One long (7minute) transition later, and Drew and I started the bike. My chain was off the bike, I guess from being jostled in the commute or something. So, I put it back on and took off. Drew left me in the dust. His superior mitochondria from Colorado living were starting to show at this point.
Ok. I brought a jacket for the ride, but the transition area was warm, in the sun and out of the wind. So, I did not think I would need it. Until I got on the bike where in the shade with the wind, it was quite chilly. I’ve never wished for a jacket so much in my life!
We started that aforementioned 2.37 mile hill. Then, the down and up portion. Not too bad. Wait, there’s a really steep two hill up ahead! YIKES! I made it in the lowest gear. Then, I bombed the downhill for maximum enjoyment.
When I noticed it took me 35 minutes on the first lap, I realized I was not going to beat my previous Danskin time of around 40 minutes. It also dawned on me that I would have to do it again. I was heavy with doubt that I could do it, but I did! I completed the bike in 1:10. I am totally proud of this time!
I did a 2 minute transition to the run, and I did not have nearly the dead leg this time because I had the dead feet. My toes and forefoot were completely numb. It felt like I was pounding wooden logs on the ground. YUCK!
The run is my nemesis, and as such, I was not too excited for it. As I was getting into the groove, I ran into Drew on his way back – wait a minute! He’s NOT WEARING SHOES!!! Yep, Drew had taken a tip from Adam and run half the race in his Five Fingersâ„¢, and once he figured out the course, he removed his shoes for the last half. So cool!
Meanwhile, I was beginning to feel my posterior tibial tendon as well as my toes and forefoot! I have been working on a new stride and mid-foot strike with Brian during Physical Therapy to relieve the stress on that tendon, which I was trying desperately to obtain with minimal to no success. I could not feel where my feet were hitting the ground through my triathlon shoes.
Wait – what if I took my shoes off, too? So, for the last mile of the run, I, too, ran BAREFOOT! It was fantastic.
I could not have run much more distance barefoot, though. I carried my shoes in my hands and enjoyed the feel of where my feet were striking the ground and the ease with which I could make minute adjustments to help my tendon.
Then, there was the finish line. TEAM ERIN were all there, and they surprised me by running me in! It was so fun!

TEAM ERIN Trifreaks 2012
I completed the run in 38:42, which was basically what I was expecting with a run/walk pace. All in all, the entire race was 2:23:41. Not awesome, but I am proud of it!
Thanks to Adam for being the most supportive and excellent husband ever! Also, thanks for the awesome picture! And thanks to Peggy, Ollie, Brandon, Melissa Charlton, Lynda, Matt, and Julie for all getting up super early on a Sunday, enduring the freakish cold and running me in! You all ROCK!!!
9/29/12- Correct Toesâ„¢: An Informational Post

Erin's Feet Correct Toes 9/24/12
I have recently (as in starting Monday of this past week (9/24/12 or so)), started wearing my Correct Toesâ„¢ daily. I had a tough time with them at first: I could only comfortably wear them for approx. 1 hour, then the tops of my feet would start to ache. I would remove them, and try again in the evening. Same thing, after one hour, ache, take off.
Finally, I started trying to sleep in them. The first few nights, I would remove them at some point during my sleep. Sometimes, I found them hurled across the room. I guess my subconscious self was not so happy about these toe spreaders. After probably 5 or so nights, I would wake up with them still on! Cool!
Now, I am able to wear them almost all day (probably 8 hours comfortably in a row with my Lunaâ„¢ sandals. Then a several hour break and more wearing. I sleep in them every night, too.
Why am I doing this? Well, the Correct Toesâ„¢ were developed by a podiatrist in Portland, OR, Dr. Ray McClanahan. According to his website, “You were born with perfect feet.” And you were! 🙂 The Correct Toesâ„¢ are supposed to help undo all of the damage that modern shoe wearing does such as correct: bunions, plantar fasciosis, hammertoes and more!
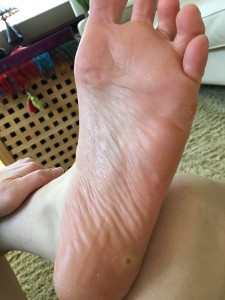
Going back to the comment that you were born with perfect feet. Let’s look at baby feet to see how they look before ever meeting footwear:
 Although this picture could be better (might update it), it does show the wrinkles on the bottom of her foot really well. Now, take a minute and look at your hand….
First, feel your palm. The skin should feel slightly different than your arm: a little leathery or tough. If you use your hands a lot, you might find rough callouses. You will see all of the lines that a palm reader uses to predict your future. Regardless of how accurate that may be, those lines show how often you bend your palm in order to make that pattern of lines. The baby’s foot has deep lines as well because she can still curl her toes and really bend her feet.
Now, look at your feet…..
Maybe feel the skin on your feet. Does it feel like your hand? Is it softer than your hand? Tougher? Does it have callouses? In looking at your feet, do you see any lines like the ones on your hand? Or is your foot somewhat line free?
If your feet have lines, good job! You have flexibility in your feet, and you probably can pick things up using your feet. Cool! No lines? Don’t worry, you can fix that. 🙂 Lines in your feet are healthy and indicate a foot that has good flexibility and is allowed to flex regularly.
Shoes with stiff soles tend to inhibit foot movement. Thus, stripping the foot of its lines.
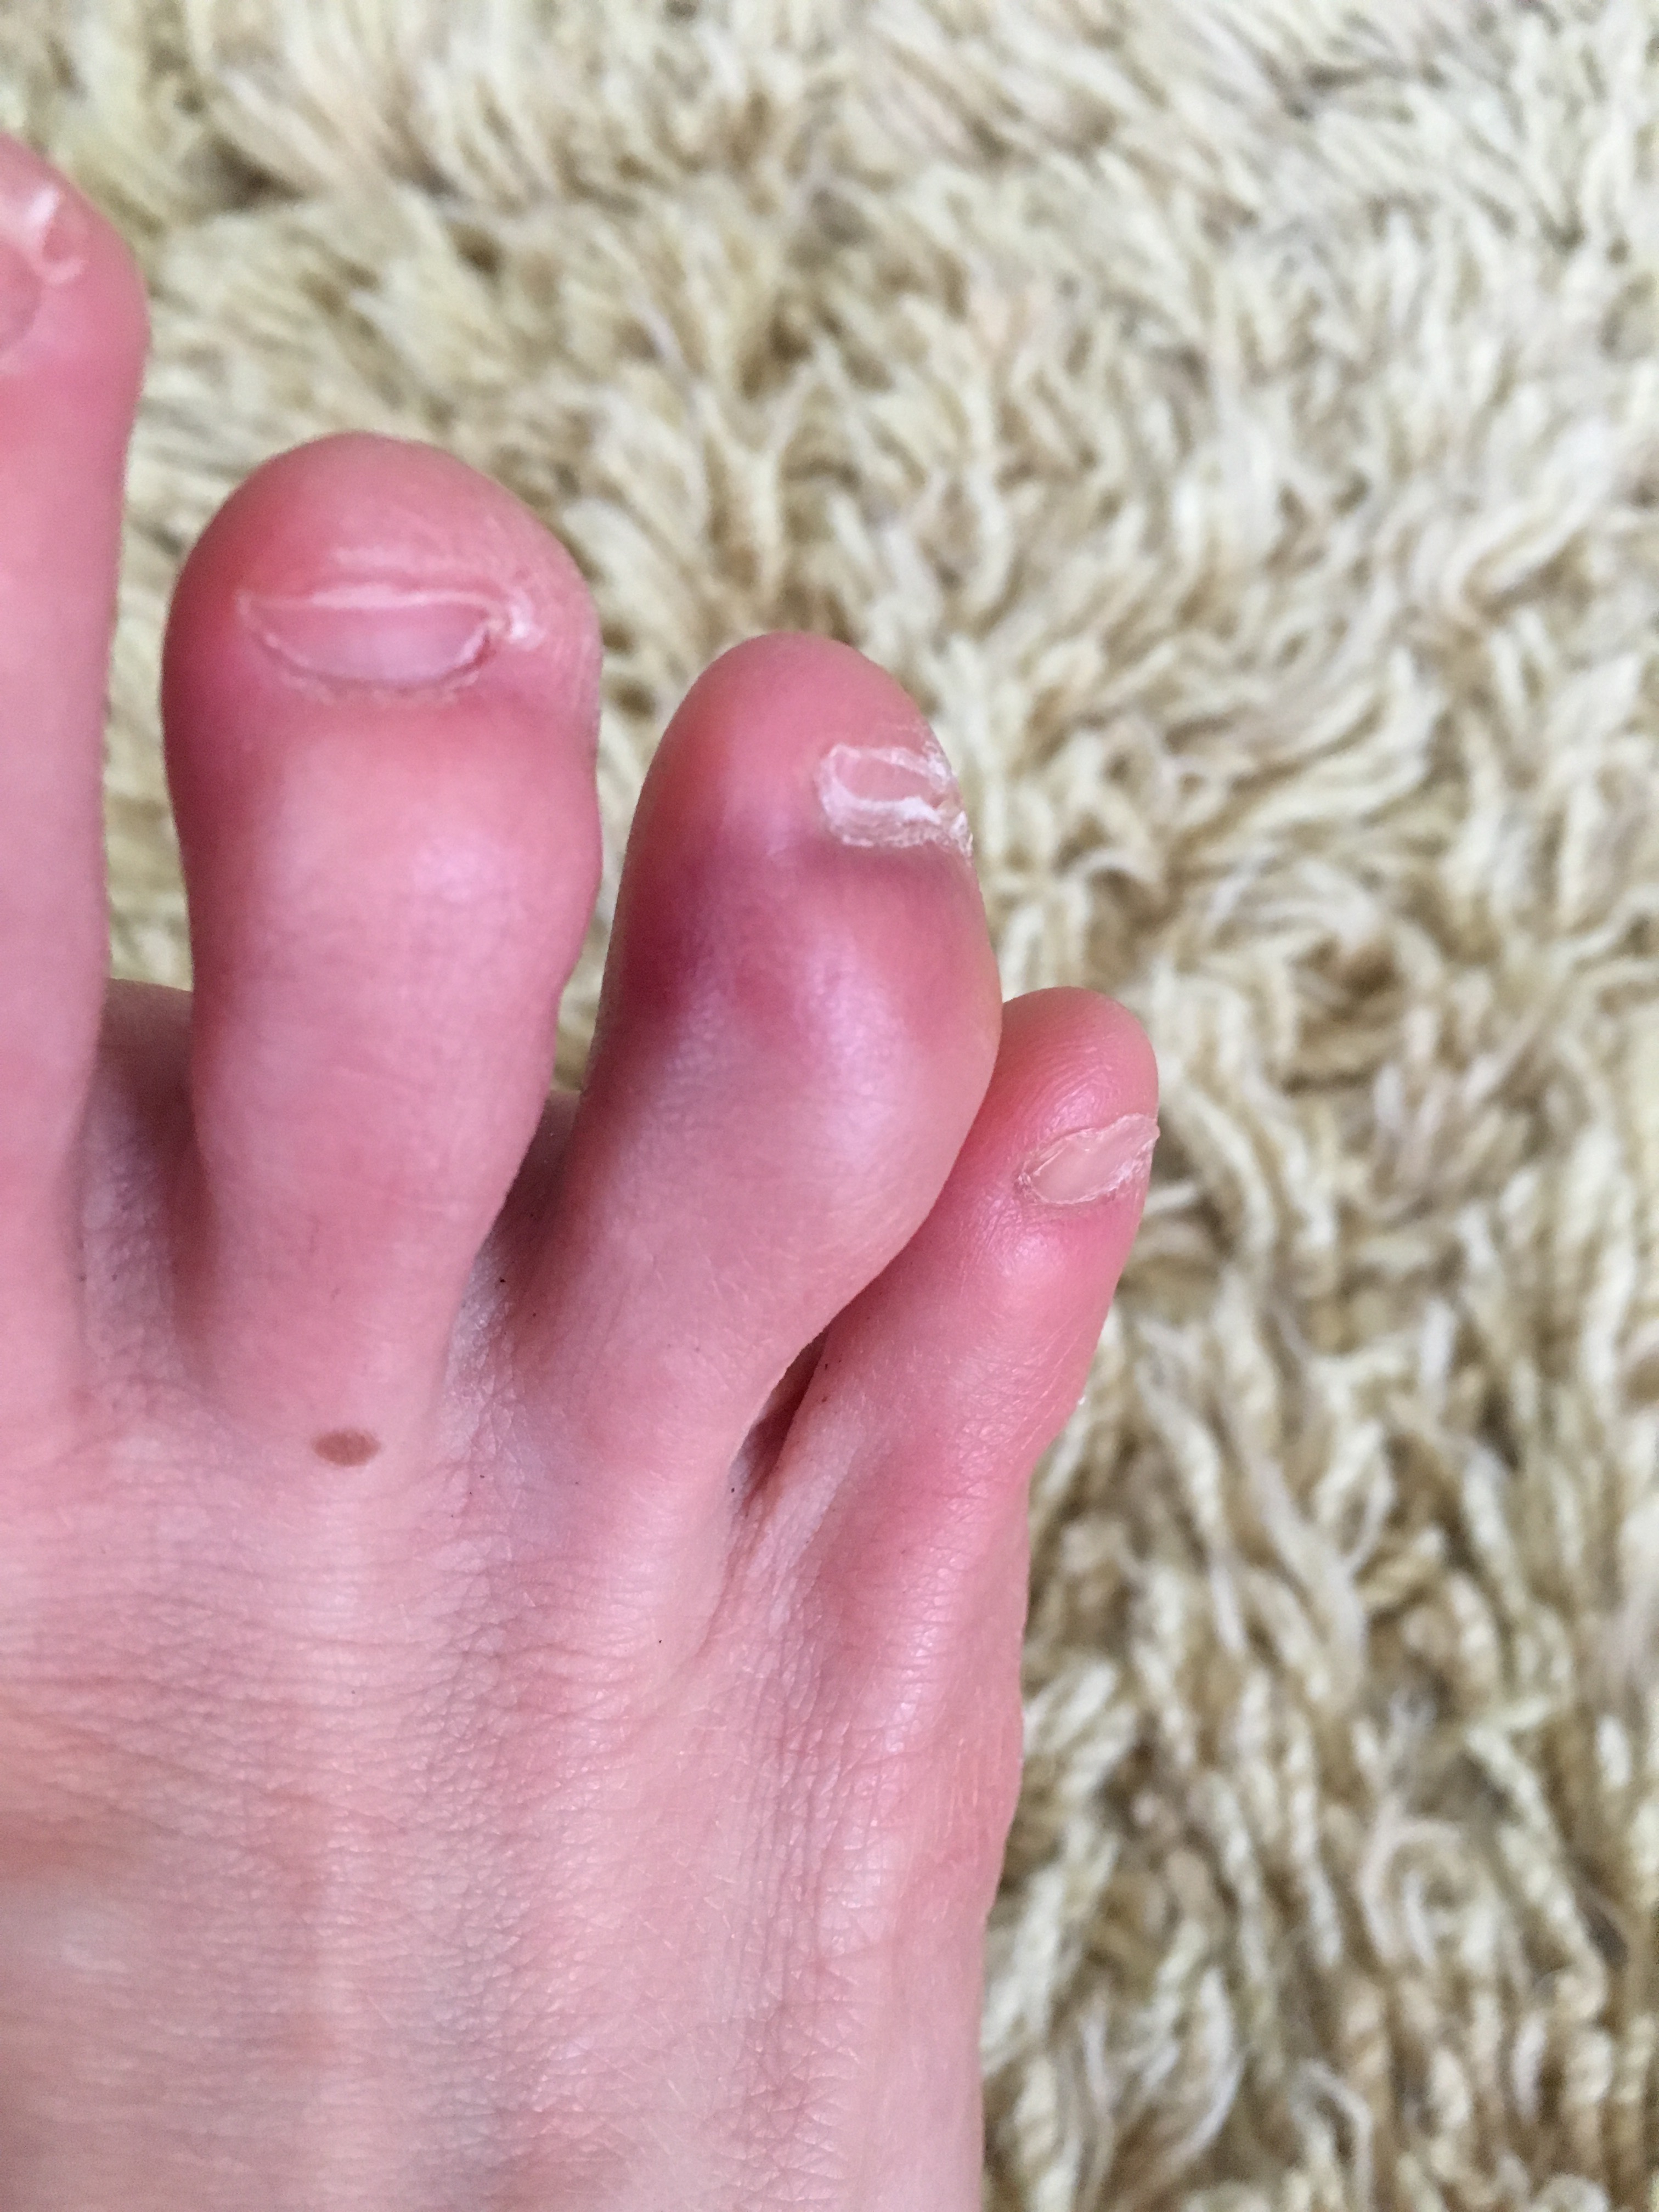
Correct Toesâ„¢ comes into this process by helping you correctly realign your toes. See on the baby’s foot how she can splay her big toe out, and how her little toe is not even touching its neighbor? Those are “correct toes!” Her feet have not been shaped by shoes and tight toe boxes.
I am in the process of reclaiming my nonexistent baby feet. By wearing Correct Toesâ„¢, I hope to accomplish toes that don’t have to touch their neighbors as well as feet that are flexible and have good lines. I think I am well on my way.
If you are brave, post your foot pictures and tell me about your foot story! I’d love to hear it 🙂
9/9/12 – A Busy Weekend: PICTURES!
Posted by admin in My History on September 10th, 2012
I decided after the race that I would catch up on the blog. In doing so, I realized that I need more pictures, which I am going to go back and add to several posts.
However, here is the foot update!
 2/27/10 Feet- Front |
 9/9/12 Feet - Front |
I remember going on and on about how toe splay was bad in my first post of pictures. Well, folks, I’m retracting that statement because it is untrue. You’re true toe position is supposed to be out on both sides of your foot. In other words, the wider the better. Think about it: if you want something that is taller than it is wide to stand with more stability, a wider base is best. Duh! Thus, my right foot is getting more toe splay, which is giving me more stability and better maneuvering, hopefully.
The left ankle is still unfortunate looking with a lot of pronation, but it certainly does look stronger.
 2/27/10 Feet - Back |
 9/9/12 Feet - Back |
From the back, check out how straight that left ankle looks from the back! Oh yeah!!! I still cannot believe I ever ran on that left ankle two years ago. OUCH!
 2/27/10 Feet - Top |
 9/9/12 Feet - Top |
My after pictures 9/9/12 are actually taken after the Iron Girl race, and my left foot looks swollen. My right foot looks like a beast from the top with all those veins and bones, while the left foot still looks weak and smooth on top. Hmmm. I wonder what is going on here. AND I am very surprised to see not so much difference in the appearance. Yes, the ankle looks stronger, but the foot is still much weaker looking than the right. Ok. I’m all over those PT exercises!
Well, this was an inspiring exercise for me. I hope that you will take a good look at your feet and see what you might do to help those little guys carry you to all the places you would like to go!
p.s. A huge thank you to my wonderful husband who formatted this post!
2/27/11 – One Year Pictures!
Posted by admin in My History on March 10th, 2011
I cannot believe it, but, yes, it has been one whole year since I began this journey. I think you will see that the differences in my feet are quite noticeable. Without further adieu, the pictorial evidence:
Before 2/27/10

One Year 2/27/11
In picture one, you can see that my left foot is noticeably less thick just below the toes than my right foot. Also, the second toe on my left foot is very far away from my big toe, which is due to the inside sesmoid bone having been removed years ago. One year later, the left foot is not only noticeably thicker, the second toe is not nearly so far away from the big toe. Awesome improvement for me 🙂
Here’s the money shot:
Before 2.27.10

One Year 2/27/11
Holy crow! Are those even the same feet, Batman? YES, yes they are the VERY SAME FEET!!! I cannot believe it myself in looking at the pictures. Of note, the left ankle still looks a little unfortunate, but not nearly so everted (I think) as before. The ankle bone looks to be more toward the center, and, overall, the ankle looks stronger and more able to provide support upward.
THE FEET!

One Year 2/27/11
The first picture was from 2/27/10, and just look at the splaying of the toes on the left foot. Now, compare the 2010 splay to the 2011 splay – WOW! It has really been reduced. Â I cannot begin to describe how good it feels to know that my feet are not without hope. The thickness of the left ankle has improved s has the definition of the muscles coming off of the foot and up into my shin. I’m not sure of the names of those particular muscles/tendons at present, but that is part of what is helping to realign my foot, I’m sure.
So, I’ve made a lot of improvement, but the journey is not over as I am still unable to commit to a full-time barefoot life due to continued weakness in my posterior tibial tendon. My next steps are (and I have already started the ones with a *):
*1. introduce the VFFs into my daily life for 2-3 hours each day with increased duration in shoes over time
*2. workout in VFFs as my body permits (i.e. I will not workout in VFFs if my tendon is still sore in order to help decrease the chance of inflammation. Sore is okay, but inflammation stalls workouts.)
*3. ease back into running using VFFs and a treadmill (currently walking 2 min, running one min, walking 1-2 min, running one min, walking until reach 10 min)
4. running outside in VFFs on softer surfaces such as grass or gravel using the alternating running/walking method
Here’s to freeing your feet! CHEERS!
10/2/10 – New Pictures! Eight Months and Counting :-)
Posted by admin in My History on October 3rd, 2010
Ok. It’s that time again! More feet pics on the intarwebs 🙂
Let’s start with the February 27, 2010 pics and compare to now:
Front:
THE FEET!

Feet Front 10/2/10 – Still Lookin’ Good!
So, the left ankle is still noticeably straighter, and the left foot is quite a bit larger and healthier looking! Yay! I wish I had taken measurements of my ankles to see the difference. I postulate that my left ankle is bigger now, but I don’t have the data to support that.
The Back:
Before 2.27.10

Feet Back 10/2/10
Yep – straighter and straighter on both ankles. ‘Nough said.
From the Top:
Before 2/27/10

Feet Top 10/2/10
The left foot is still, today, somewhat more unfortunate than the right foot, but it does not resemble a fan any longer. I can see that there is work to be done to continue “beefing up” that foot so that it does not look like it collapses toward the outside. However, it looks so much healthier than before.
I still marvel at how I ever ran on my feet previously. They were so ill prepared for running, and I didn’t even ease into it. I just started running 2 miles. It is a wonder that my feet have not suffered more damage. The human body is truly impressive, biomechanically speaking.
I also took more pics of my body as a whole to see if there are improvements.
The front:

Running Gear Front 2/27/10

Front Running Pants 10/2/10
I cannot tell much of a difference in this gear. So, I decided to start a new comparison with shorts instead of pants.

Front Shorts 9/25/10

Back Shorts 9/25/10

Side Shorts 9/25/10
So, those are my new stability shoes in the pics. Also, I wanted to be able to compare the muscle tone in my legs as well as my shoulders, which was not happening with the pants and other shirt. I don’t think I’ll get hit by traffic anytime soon….
All this aside, my new goals are as follows:
1. In two months, I would like to see more development in the muscles of my left foot and ankle. I have been putting off the foot specific exercises in favor of my shoulder exercises, but now, I think it is time to return to the original plan.
2. Overall better muscle tone across the board. I have been working with Melissa on this, but my schedule and general laziness have severely impaired my progress in this area. I am currently working out about twice per week – NOT ENOUGH. My goal is to do my workout from Melissa at least 3 times per week.
3. Better cardio training. I would like to do elliptical at the gym 30 minutes 3 times per week with actual running happening twice per week. I think this would ease my feet into the longer distances with much less inflammation.
4. More time in my barefoot shoes. My goal is to wear my barefoot shoes for 2 hours each day for 7 days. Then, up the time each week by 30 min per day.
Ok. Time to get to work! See you at the gym 🙂
Physical Therapist 6/29/10 – MORE PICTURES :-) and an EDIT
This last week has been another bummer. On Friday, I spent the day in the kitchen making tomato sauce (Picture 20lbs of tomatoes, and you’re on the right track.) and baking a Yay-You-Finished-Your-First-Marathon cake for my husband. By the time he got home, my left posterior tibial tendon was crying out for mercy.
Today, at my physical therapy appointment, Travis started me back at what certainly does feel like square one. 🙁
This is just part of the process. I know that my foot is improving because it is USING the posterior tibial tendon, but the tendon is not strong enough (even with all the work I’ve put into getting it stronger), yet.
The Story of Muscle: [Edit – I stand corrected :-)]
Travis Orth, my physical therpist, had a few corrections on my story of muscle.
“So, I think you got the story of muscle close, but not quite right. Â I probably was not as clear as I could have been so here is another explanation. Â With strengthening, if you are actively completing exercises for the first 2 weeks there will not actually be an increase in muscle size, but you may experience a gain in strength. Â This gain in strength is attributed to increased muscle fiber recruitment (of muscle fibers that you already have) from your brain to that muscle group. Â It takes approximately 4 weeks to verify the increase in muscle cross-sectional area, so any strength increases prior to this point are likely attributed to improvements in neuromotor recruitment. Â This is all somewhat flexible and there is likely some actual muscle growth prior to the 4 weeks, but they are the numbers and guidelines that I like to follow. Â So with your feet, there are likely increases in muscle size, that is why you see such a dramatic difference in foot position. Â If you were simply recruiting more muscle fibers of the muscle that you already had I don’t think you would see these changes. Â Furthermore the changes are likely due to increased resting tension on the tendon, tibialis posterior, that is pulling up the arch of your foot and preventing collapse of the foot. Â This increased resting tension is from actual increased muscle size, so congrats you did it! Â However, as you have noted, there are still gains that can be made and the muscles can get even larger and stronger.
A lot of the information that I have provided is from the Shirley Sahrmann book titled “Diagnosis and Treatment of Movement Impairment Syndromes”, and she cites the article:
Moritani H, Devries HA: Neural factors versus hypertrophy in the time course of muscle strength gain. Â Am J Phys Med 58: 115, 1979.”
Travis wrote the above quote in an email after reading the blog. I thought I would share it with all of you fine folks so that you are not misguided by my not as educated guesses on muscles 🙂
——Back to the original post—-
All of this muscle building got me wondering just how my feet may or may not have changed. So, now for the pictures!
Before 2.27.10

After 6/29/10
LOOK!!! I think I can tell that my left ankle is not caving as bad! Yahoo!!!
Before 2.27.10

After 6/29/10
Are those the same feet and ankles? No wonder my posterior tibial tendon is sore. Look at all the work it has been doing! My left ankle is noticeably straighter in this picture. I cannot tell you how very good it feels to have some part of my hard work pay off 🙂
Before 2/27/10

After 6/29/10
After careful scrutiny of these two pictures I have several things of note.
1. I really need to keep the perspectives and lighting the same.
2. In the Before picture the left foot looks like a fan, but in the After picture, it is beginning to look more like a foot. i.e. the left foot getting thicker and straighter from the heel to the toe. 🙂
3. I think I see some muscles that weren’t there on the outside of the left foot!!! Yay!!!
Overall, I am really liking what I see after a mere four months! That is all! And that is a lot. I am looking at a very long time frame. The goal will come. It just might take another year.
Run 1 – February 19, 2010
Posted by admin in Training (running, cycling, etc.) on February 28th, 2010
Welcome back!
As promised – PICTURES!
First, I took photos of how I look now in the hopes that later on in this experiment, I will look markedly healthier. Let’s take a look see, shall we?
So, this is the front.

And this is the side - wow, my posture is terrible! Sorry, Mom...

I don't really have much to say about this other than, I had better look better in a few months.
Ok, I have some work to do on the physique, but all that depends on the foundation. How do you like my injinjiâ„¢ stripy socks? I know, they’re hot! I am wearing the Sprint Vibramâ„¢ Five Fingers.
Now, it’s what you’ve all been waiting for:
THE FEET!
Ok, here's the real deal. The left foot is the major pronator. Hence the issues will probably lie with that foot.
Boy are those unfortunate feet or what?
Ok, so let’s talk about my biomechanics. On the first feet picture, note how the left big toe splays out? Well, I mentioned that in my first post, and it is because that is foot that had the lateral sesmoid bone removed. Your foot has two tiny bones, the sesmoid bones, that sit in that big fleshy area just below your big toe. They are sitting in there just like the patella (or knee bone) sits in the knee joint. I think they are used to absorb shock or something. Anyway, because my inside one was removed, I have been told that my toe will continue to splay more and more as I age. I have no doubt of that, but I think that by keeping a careful eye on it, I can somehow try to slow the process and maybe stop it with exercise and sheer force of will.
The next part of my biomechanics, my feet are very fortunate to be in as good of shape as they are because when I was born, the bottom of each of my feet was bent all the way around to touch the inside ankle bone. I wore tiny casts for the first six months, and then shoes that looked like they were on the wrong feet. So, I do not have traditional “flat feet”. I have an arch, but when I put weight or stress (like pushing off while running), my foot flattens out and the arch falls or gives up, as I like to think of it.
Now, onto the first run:
Friday, February 19, 2010, I knew that in order to use the Five Fingersâ„¢ to run, I should probably start on a surface such as gravel or grass. So, I set off to run in a park with an approximately 3 mile loop. My goal for my first run was 1.5 miles straight, which I felt was a little optimistic since I had not been running in a long time.
I started out on grass, but I did not like the squishy wet of it. So, I switched to the gravel path, which was marvelous and fun to feel through the bottoms of my shoes. My first observation was how easy it was to adjust to the surface I was on. I could move around puddles and adjust how my feet were hitting the ground much easier.
Running in gravel or on grass is essential for me at this level of the barefoot game as during the parts where I had to hit the pavement, I could tell a lot of jarring and very bad things were happening to my feet.
I tried to maintain a forefoot strike, but I gotta tell ya, that uses a lot of different muscles than a heel strike. So, I switched between forefoot and midfoot strike through the run as a heel strike is truly uncomfortable and a little unnatural in the barefoot running for me.
I finished my 1.5 miles with a 9:22 per mile average pace. Woohoo!!! Yeehaw!!! As a matter of fact I felt so good that a walked a little, and then did a couple of approximately 100 meter sprints for fun.
The aftermath:
The next morning my ankles (mostly the inside just under the inner ankle bone) were killing me! I walked completely stilted. It was very painful. However, not in a I-just-pulled-something-really-badly kind of way, but in that I-just-had-a-great-and-challenging-workout kind of way.
I took Saturday and Sunday off, and prepared to run again on Monday.